Microsoft Word 2010 gives the ability to create large documents. One often needs to edit and manage the document before it is finally finished. Rearrangement (of slides) in PowerPoint is rather easy, as one just needs to drag and rearrange the thumbnails for the slides.
In some cases one might need to reorder pages in a large document. In this step-by-step tutorial we shall describe how you can reorder your pages in a Word document, as there is no function (similar to that in PowerPoint) that allows you to drag pages around the screen.
What Will You Need?
Microsoft Word 2010
Step 1: Open Microsoft Word 2010.
Step 2: Open the document in which you wish to reorder the pages. Scroll down to the page that you wish to move. We are going to use a Test Document for this tutorial. It consists of 4 pages.
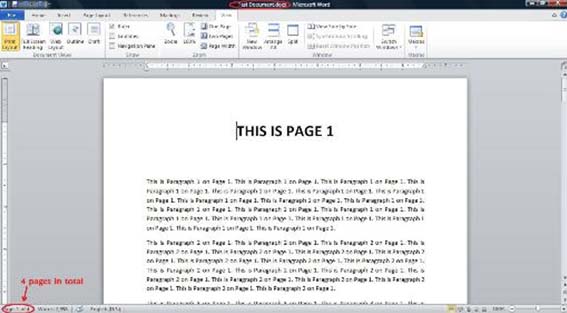
Place the cursor right at the beginning of the text, from the point where you would like the data to be moved.
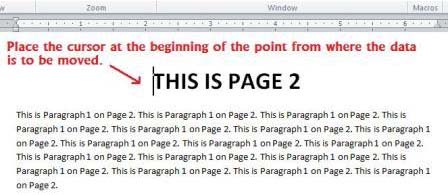
Hold the "Shift" key and then press the "Page Down" button on your keyboard. The text on the page should be selected now. If all the text that you wanted to select did not get included in the selection, then keep holding the “Shift” key and press the down arrow key on your keyboard to select the additional lines that you want to include.Similarly, if some extra text has been included, then keep holding the “Shift” key and press the up arrow key to deselect the lines that you wish to exclude from the selection. The highlighted area shows the text that you have selected. Once you have selected the text that you want to move, release the “Shift” key.

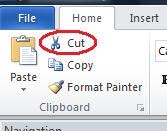
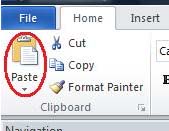
Step 3: Once you have selected the text that you want to move, press and hold the “CTRL” key and press “x” to cut your selection. The other way to cut the selected text is to click on the “Cut” button in the Clipboard box in the Home tab.
Step 4: Scroll over to the area where you want to paste the text. Make sure you keep the cursor right at the area where you want the text to fit in.
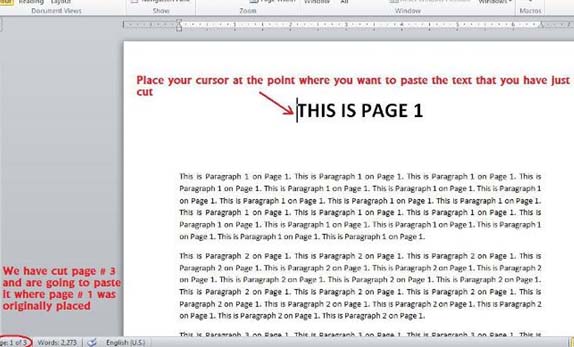
Once you’ve positioned the cursor where you want to place the text, hold down the “CTRL” key and press “v” to paste the text at the desired position. Or you can also position the cursor and then click on the “Paste” button in the Clipboard box in the Home tab.
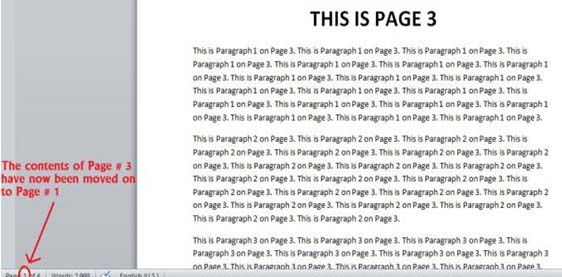
Finally You have now successfully moved the contents from one part of your document to another.
When you Start using Windows 7, you find out that a few of the good Windows applications are not there. It is very easy to take care of that. You can install Windows Live Essentials in Windows 7 and so get your desired Microsoft applications in your computer. You should install Windows Live Essentials in Windows 7 as Microsoft has not added a number of former applications e.g. Photo Gallery, Messenger and Mail in Windows 7. Jointly called the Windows Live Essentials, the group consists of Family Safety, toolbar, Writer, Mail, Movie Maker, Photo Gallery and Messenger. This group of applications is now accessible by a simple additional download. Microsoft has done this in order to renovate as well as make progress in those features and not disturbing the foundation of Windows 7.
To install Windows Live Essentials in Windows 7 and thus get the Microsoft applications, you have to follow these steps:
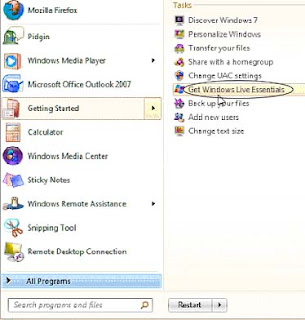
Click on the Start button.
Go to Getting Started in the Start Menu.
Choose Get Windows Live Essentials.
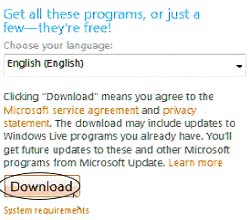
The Windows Live page will appear. Choose your language and click on the Download button.
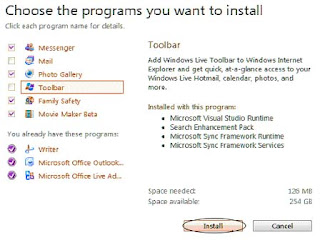
Check the boxes of the MS programs you want to install. These include Movie Maker, Photo Gallery, Mail and Messenger. Additional feature of Family Safety as well as a Toolbar can also be installed.
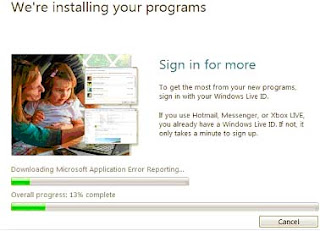
You will see this progress screen as the selections are being installed. It will take time according to the number of programs you have selected.
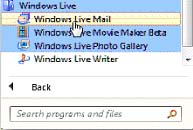
You can find the installed programs in the Start menu under Windows Live.
When you install Windows Live Essentials in Windows 7, you will as well get an extensive variety of additional components associated with the key applications. The users will find out that the Essentials installer will furthermore install .NET Framework, Microsoft Sync Framework Services, Microsoft Sync Framework Runtime, Search Enhancement Pack, Windows Live Sync, Direct3D 9, Microsoft Application Error Reporting etc.
Configure Hotmail, GMail and Live Email Accounts to MS Outlook 2010
Microsoft has been claiming that it will improve its Hotmail service, making it a better webmail provider. Nevertheless, new version of Outlook, i.e. Outlook 2010 is already out. This article will instruct you on how to incorporate Outlook and Hotmail.Outlook 2010 is compatible with many email systems, such as POP3, IMAP and Exchange accounts. Exchange syncs your calendar and contacts as well as your email but POP3 and IMAP does not do so. If you use the Hotmail Connector you will be enabled to sync your email, contacts and calendar with Outlook . This will make it easy to access your PIM data anywhere you are.
The procedure involves 8 easy steps:
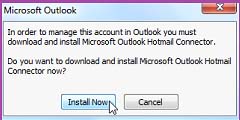
1. In order to incorporate Hotmail into Outlook you need to first install the Hotmail connector. Before doing so, ensure that Outlook is not being used and it has been closed. Then go ahead with the installation.
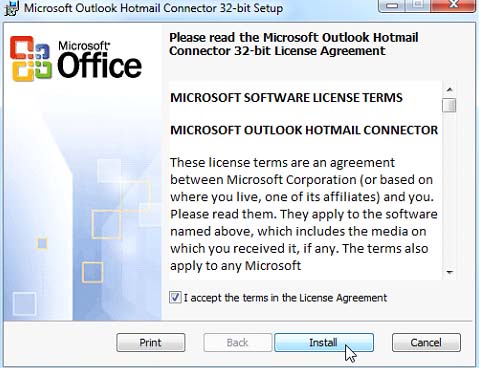
2. Outlook will prompt you to download Hotmail Connector if you enter your hotmail account in the New Account Setup. If you haven’t already exited Outlook you will have to do so and enter your information again when you restart Outlook, thus it is better to install Hotmail Connector first.
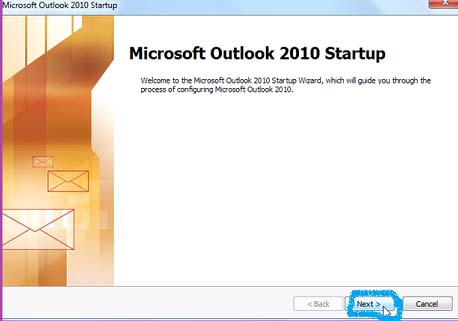
3. The actual process will start at this point. If you are running Outlook 2010 for the first time, the screen given below will appear. Click the Next to continue setting up Outlook.
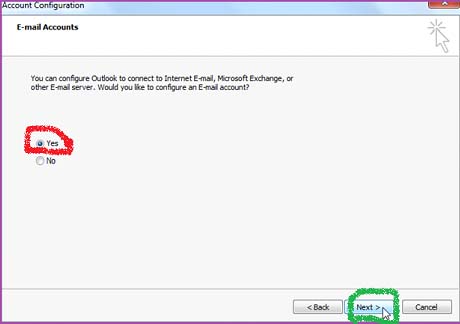
4. When you have pressed next, you will be asked for confirmation. Select Yes and then Next for the second time.
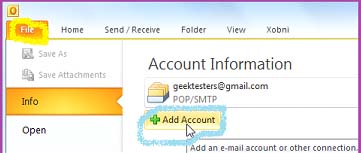
5. If you have been using Outlook, just add a new account by pressing the File button and then clicking the Add Account button.
6. After you have selected the required button, enter the information related to your Hotmail account and once again press Next.
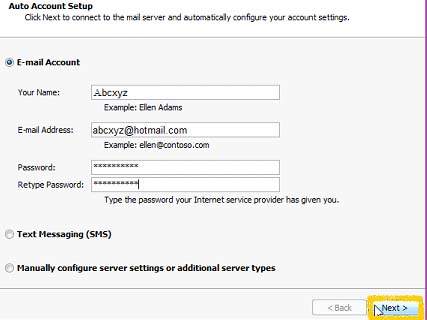
7. Outlook will generate a search for your account settings and then it will automatically setup the account with Hotmail Connector which has already been installed.
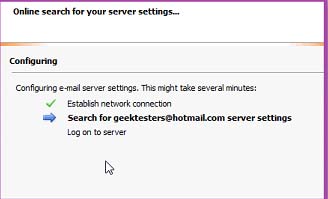
8. Once all of the steps listed above have been completed, the following screen will popup. Just press the Finish button, setup has been completed and you can check your Hotmail in Outlook.
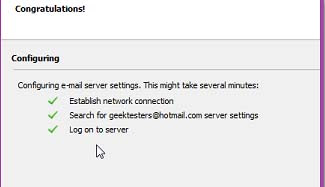
Setup has been completed so now you have officially synced your Hotmail account with Outlook 2010. You will receive a notification at the bottom of your window stating that you are connected Windows Live Hotmail. Your email will be coordinated with your Hotmail account, vice versa your calendar and contacts saved on Outlook will be synchronized with your Live calendar and contacts. This procedure will ensure setting up an optimum full Exchange without actually getting an Exchange account. As a matter of fact, Hotmail Sync seems to be faster than IMAP synchronization.
Hotmail generally isn’t as popular as Gmail but it works really well with Outlook integration. If you frequently use Window Live services, or want to give them a go then Outlook Connector is the best option to keep the cloud synced with your desktop. Or maybe you are just like many other Hotmail users who want to access Hotmail with their other email accounts, this is a useful procedure for you too.

Most people, dropping a CD into their disc drive and clicking "Import" in iTunes is good enough. For music freaks, though, it's not—and with good reason. Here's how to digitize your tunes, the right way.
First off, some reasons to take this road: iTunes is a decent audio encoder, and it'll get your music from point A—the CD—to points B, C and D—your computer, your MP3 player and your backup drive—without much trouble. But it'll do it with a less-than-great encoder, with occasionally inconsistent tagging, with album art that'll only work on Apple devices, and without support for the best lossless audio formats and MP3 encoding options, which you probably want, whether you know it or not.
In short, the ripping process deserves a little more care than iTunes or Windows Media player can give it. You can pay people for this, which feels dumb and wasteful, or you can do it yourself. It's not difficult, at all.
Below are the Some Steps that i will Refer you to Follow :

The first step to ditching iTunes is to, well, ditch iTunes. What we're looking for is ripping software that offers more encoding options than iTunes, but more importantly, a better encoder. And as far as MP3 encoders go, the open source LAME is as good as they get. There's plenty of software for both Mac and PC that leverages this encoder, but here are two programs that do lots, lots more.
Mac OS X: Max
When extracting audio from compact discs, Max offers the maximum in flexibility to ensure the true sound of your CD is faithfully extracted. For pristine discs, Max offers a high-speed ripper with no error correction. For damaged discs, Max can either use its built-in comparison ripper (for drives that cache audio) or the error-correcting power of cdparanoia.What this translates to: Great error reduction, fantastic sound quality, and tons and tons of encoding options—not that you really need those to do a good rip, but hey, they can't hurt. On top of all this, Max is also a great file converter, in case you've got some delinquent WMA files scattered around.
Windows: Exact Audio Copy
Exact Audio Copy is a so called audio grabber for audio CDs using standard CD and DVD-ROM drives. The main differences between EAC and most other audio grabbers areWhat this translates to: The best error correction money can buy, for free. Seriously: Audiophiles swear by exact audio copy, and with good reason. You'll have to download your own LAME encoder before you can enable MP3 encoding in the program options, but you can do that right here without a problem. Additionally, setting up tagging, which you'll definitely want to do, takes an extra, albeit easy, step.
• It is free (for non-commercial purposes)
• It works with a technology, which reads audio CDs almost perfectly. If there are any errors that can't be corrected, it will tell you on which time position the (possible) distortion occurred, so you could easily control it with e.g. the media player
If you want to take a simpler route you can just download CDex, which supports LAME and tagging databases out of the box, and produces results nearly as good as—if not as good as—Exact Audio Copy.
Now Choose Your File Type :
MP3: If you're encoding only for portable devices, not concerned about archiving perfect copies of your music, hate hate hate audiophiles, think FLAC and OGG just sound like gurgling baby noises, you're probably going to want to stick with MP3s. Yes, there are other formats that offer a better size-to-sound ratio, and no, it's not open source or anything, but for pure compatibility, control, and encoder choice, it's hard—-no, impossible—to beat MP3. And if you set up your encoder correctly, MP3s can sound great.
It's tough to pick the optimal MP3 bitrate on your own, since at a certain point, differences in sound quality seem to come down as much to psychological factors as to actual clarity. Thankfully, we've crowd-sourced this issue and come up with a rough guide: 256kbps is, it seems, where people just can't really tell the difference. In practical terms, this means setting your encoder to these settings:

That's no higher than 256kbps VBR—for variable bitrate, which modifies the amount of information in your file's stream according to how much is needed, and saves you space without sacrificing quality—with the highest (read: slowest) available encoding option. For almost everyone, in almost all circumstances, this'll do, and it sure beats iTunes default 160kbps constant bitrate rips.
FLAC: If archiving is your intention—as in, digitizing your music without losing any quality, no matter how imperceptible—then you're going to want to go lossless. And of the lossless formats, FLAC is the most well-supported in terms of software and hardware, albeit not on any of Apple's products—though iTunes can be made to play nice with FLAC with a few simple tweaks.
But don't fret! The beauty of FLAC music is that it can be converted to other lossless formats, like Apple's iPod-compatible Apple Lossless, without losing any quality, or compressed into MP3s without having to worry about muddy transcoding. Think of them as CDs without the physical disc, basically.

That's no higher than 256kbps VBR—for variable bitrate, which modifies the amount of information in your file's stream according to how much is needed, and saves you space without sacrificing quality—with the highest (read: slowest) available encoding option. For almost everyone, in almost all circumstances, this'll do, and it sure beats iTunes default 160kbps constant bitrate rips.
FLAC: If archiving is your intention—as in, digitizing your music without losing any quality, no matter how imperceptible—then you're going to want to go lossless. And of the lossless formats, FLAC is the most well-supported in terms of software and hardware, albeit not on any of Apple's products—though iTunes can be made to play nice with FLAC with a few simple tweaks.
But don't fret! The beauty of FLAC music is that it can be converted to other lossless formats, like Apple's iPod-compatible Apple Lossless, without losing any quality, or compressed into MP3s without having to worry about muddy transcoding. Think of them as CDs without the physical disc, basically.
Now Embed Your Album Art :

This is something else that iTunes doesn't do right: album art. Sure, it'll find it, but when you transfer all your music to a non-iPod music player, your art is gone. Why? It's because iTunes stores the album art in a separate database, rather than in the song file's ID3 tags, where it should be.
On Mac OS, assuming you're doing your listening in iTunes, which is pretty handy at fetching album art, you can just use one of Doug's famous iTunes scripts to write said album art directly to your MP3 files. Here's how you install it:For Windows users, Lifehacker's written a fantastic guide to collecting and embedding album art, which you should definitely read. The short version? Download MediaMonkey, and let it do the work for you.
Granted, once you embed album art into your files, apps like iTunes and Windows Media Player might not display it, and may ask you to search for it from their databases. This is fine: Both programs use proprietary album art storage systems, so just because they can't see your ID3 tag album art doesn't mean it's not there, or that you shouldn't have embedded it—having it around can't hurt, and it's by far the most compatible and rational method for storing album art, as far as other software, most MP3 players and long-term storage go.

If you are not having the CD or DVD from the manufacturer any more, you'll need to download it from the manufacturer's website. As with finding the printer manual, you can do a Google search for the name and model of your printer plus the word "driver" (e.g., "HP Deskjet 3050 driver").
Here are some links to the driver downloads sections of major printer manufacturers.
HP: Select your printer category or type in the name and model in HP's search box.
Canon: Click on "Consumer & Home Office" then "Printers & Multifunction" then your printer series and finally "Drivers & Software" beside your printer model.
Epson: Choose your printer category then select the model, or type in the product name in Epson's search box.
Make sure you download the driver specifically for your operating system (e.g., Windows XP or Windows 7).Then follow the instructions above, replacing the part with the installation CD and using the downloaded driver instead.
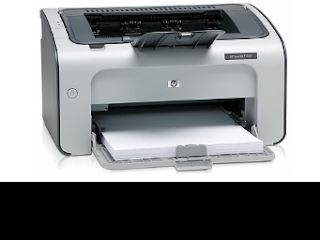
Most printers are easy to set up by following the manufacturer's instructions and using the installation disc. The process is a little trickier if you're new to computing and don't have the CD or instructions any more. This beginner's guide will show you how to get your printer up and running.Install a HP Printer, Install a Dell Printer, Install a Intel Printer,
Use the Manufacturer's Instructions and Installation Disc :
Always default to the instructions and use the disc that came with the printer. If you've lost your printer's manual, try doing a Google search for the name and model of your printer (which you can find by looking at your printer) plus the word "manual" (e.g., "HP Deskjet 3050 manual"). Manuals Online also has a collection of printer manuals that may help.
The set up process is usually the same for most printers:
- Install the cartridges in the printer and add paper to the tray.
- Insert installation CD and run the printer set up application (usually "setup.exe"), which will install the printer drivers.
- Connect your printer to the PC using the USB cable and turn it on.
- Look in your printers folder on your computer (on Windows XP, go to "Start" then "Printers and Faxes". On Vista and WIndows 7, hit the Windows key and type "printers" into the search box to quickly get to the Printers section. For Mac, go to System Preferences and select "Print & Fax".)
- Print a test page. In Windows, right-click on the printer and go to "Properties" then click the "Print Test Page" button. On Mac, click on the "Options & Supplies" button, then the "Utility" tab and click "Print Test Page"
If all goes well, your test page will print and your printer will now be set up.
Leave Below Comments for any Help.

Steps for Formatting the Windows XP System and Installating the New Opertaing System :
For Windows XP Downloads : Click Here
For Windows XP Products Review : Click Here
1.First of all insert the windows xp bootable disc into the drive and restart the computer
2.The the screen displays "Press any key from boot CD" Press ENTER (If windows starts automatically without displaying such a message then follow the Step-A)
3.System will load some files please wait untill it completes it takes some time
4.After that "Windows XP Professional setup " will appear Press ENTER
5.After that "Windows XP Licencing aggrement " will appear Press F8
6.Again "Windows XP Professional setup " will appear Press ESC
7.Now the system shows an other screen containing your Hard disc partition drives, if you need to format only C-Drive the select C-Drive using arrow keys in keyboard and Press ENTER (Or if you wanted to format total system follow Step-B)
8.In the next screen Select "Format the partition using NTFS file system " Press ENTER
9.Now the setup will Formats your C-Drive and next it will copies files, it takes much time, be patient
10.Now the system starts rebooting wait for 15 seconds or Press ENTER to reboot immediately
11.System gets restarted And again asks "Press any key from boot cd" But please dont press any key
12.Windows starts installing, it takes approximately 39Minutes to install but dont go away from system there is some manual work while installing
13.Exactly after 6 Minutes system displays an message box click on Next using Mouse
14.In the next screen "Personalize your software" will displays enter your Name and organization
15.Enter The Windows XP key in the next screen and Press ENTER
16.In the next screen it asks for computer name enter the name and there is also another field asking adminstrator password, leave it empty and Press ENTER
17.In the next screen set the Date and Time zone (+5:30) and click Next
18.Setup still requires 29minutes of time to complete and after that it gets restarts And again asks "Press any key from boot cd" But please dont press any key
19.In the Next Screen "Display Setting Box" Will Appear Click OK And "Monitor Setting Box" Also Appear Again Click OK, Then The Window Gets Started
20.Click on NEXT it And Next Select Help Protect My PC And Then Click Next And then Enter Your User Name (Different From Computer Name) Click Next And Then Click Finish :)This Is The Way To Format Your System Easily :)Exceptional Cases
STEP-A::Again Restart Your Computer And While restarting
Continuously press DELETE button in the keyboard
* "Advanced BIOS Features" Will Displayed* Click On First Boot Device And Press Enter*Select CD-ROM By Using Up_Down Arrows in Keyboard and Press
Enter*Press F 10*Press Y And Then Press ENTERThen the System Again restarts And Now it Will Ask "Press any key
from boot cd" Then Continue From Step 3
STEP-B::If You Wanted To Format Your System Completely Follow These Steps
*Select The C-Drive And Then Press D And then Press ENTER And
Then Press L*In The Same Way Delete All Drives D,E,F... By Clicking L and D
Keys*Your Hard Disk Will be In A Single unpartitioned Space Form Now
Our work is to create Drives with Suitable Memmory For Each Drive*For Example If You Have 160GB Hard Disc And You Want 4 Drives
Give 40 GB For Each Drive(Partition need not be same for all drives
we can give (40+40+40+40) Or (30+40+40+50) Or (30+30+40+40+20)
Etc....*To Make Partition First Click On The Unpartitioned Space and Press
C And Press ENTER And Give The Appropriate Memory Space Such
That C-Drive Created*Agian Click IOn The Unparyioned Space And Create D-Drive.. In
The Same Way Create All Other Drives By Clicking C*After Partition Select C Drive and Press Enter.. Thats it The Windows
Setup Will Be Installed