
You can enable this option to run windows update automatically when your computer will be connected to the internet. Through this service you can check the Microsoft website for downloadable improvements to the operating system and security patches also. These latest updates will protect your computer from the attacks of latest viruses and potential hackers. Windows Update is free of cost and important service that is why always makes sure its running on your computer.
Follow the given steps to enable this important feature on your computer:
To use this feature, you will need to be logged into your computer with administrative rights.
Click Start button and go to Settings then click on Control Panel option. Now system will open the Control Panel windows with different categories.

Just click on System option, a small System Properties dialog box will appear with many options like System Restore, Remote and Automatic Updates and others.

Click on Automatic Updates tab, if it is not selected already then click on “Automatic (recommended)” box. Then this will display the different setting to continually check Microsoft’s website for updates.

Here you can pick a download and installation schedule or select the option “Download the updates automatically and notify me when they are ready to be installed” in the section of settings. Through this option you can download updates automatically and it will install the updates immediately.
If you wait a day or two before installing an updates to make sure there are not any serious bugs reported about the latest patch you can check it through Microsoft website. Now click on Ok button to finish the process.

Trick to Stop or Disable the Ads in Youtube While Playing an Video.
It's Impossible to Stop the Ads in Youtube but You can Try the Alternate Method to Watch Videos without Ads and Enjoying the Online Video Sessions. A Firefox extension TubeStop was created to keep YouTube videos from automatically playing on the video-sharing site. A great side effect of TubeStop has been the removal of the new ads on YouTube clips.
How this will work : TubeStop replaces YouTube’s native player on the site with the embeddable version, which has not been ad-ified yet. So get the TubeStop extension now, and you’ll be prepared for when Google starts rolling ads on YouTube again.

Some times Some websites banned by Government, ISP and may be by your office network administrator.
This Tricks are very useful, if you are using internet particularly in school, college and office.
Follow any of the Below Tricks to Enable or to Access the Websites :
Trick 1: Search the banned website, for example www.example.com in Google and yahoo search engine then open the cached copy of that page to access the website. You can get also cache link of that website, if you search in Google with keyword cache:URL name and get cache link to access the website.
Trick 2: Another method to access the banned website using its IP address, because you can open the website with IP address instead of actual URL name. This Trick bypasses the URL based restrictions. For example if www.example.com is banned in your school, you can open it using IP address 216.178.32.51. You can search online IP conversion tools to get IP address of any website.
Trick 3: There are some mini web browsers can help you to open the banned websites, for example Opera Mini Browser, install it and try to open any banned website. Another Real Player browser can successfully help you to access the banned website. This Real Player browser bypasses the many restrictions of website banned tools.
Trick 4: There any many websites Anonymizer tools are available to fetch the banned website. These anonymous surfing tools that protect your identity on the internet and give the access to banned sites. As far as the service provider is concerned you are viewing a page from Anonymizer and not the blocked site.
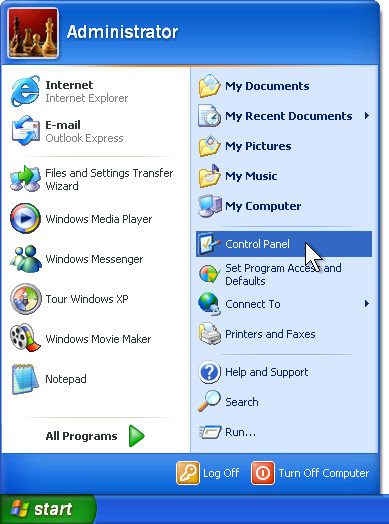
Usually Sometimes You will be Unable to Open the Control Panel if the Virus Security blocks the Registry.
The Below Post may be Useful to you to Enable it 2nd Time in System.
Different antivirus and firewall programs are used to manage the security of the computer. Some times this is build-in antivirus or firewall program in windows XP to maintain the computer security.
But if your windows is not provided with any antivirus, firewall program and Automatic Updates, your windows security center will alerts you a message "Your computer may be at risk. Your virus protection status is unknown" with useless repeating reminder.
You can disable this message permanently by changing the values of “AntiVirusDisableNotify” in windows registry.
Follow the given steps to edit the computer registry for disable message:
- First click on Start button then type Regedit in Run option.
- Here locate the location to: · HKEY_LOCAL_MACHINE\SOFTWARE\Microsoft\Security Center
- Here in right side panel, double click on AntiVirusDisableNotify and set its value 1.
- Finally Close All Programs and Re-Start Your System to Check the Effects.

Web Accelerators will Increase Your Browsing Speed
Some Users may be still using any slow dial-up internet connection due to unavailability of any broadband connection in their area. The Web Accelerator application designed to provide the full acceleration for your routine web sites browsing. With the help of Web Accelerator you can browse your internet 4 to 6 times faster than normal dial-up connection. Basically this services compressing the website text data, images and heavy graphics to open or download this data with high speed. This technique is more useful for static websites and for email applications but don't accelerate with secure and downloading audio or video files. Some good web accelerator retains your system cache to reuse websites with faster speed and can also block windows pop-up. If you are using FTP sites and downloading any program using dial-up, then web accelerator is not for you. There are various web accelerator software are free available on Google : Click Here .
Usually you may be Spending Your Maximum time daily with internet browsing.
You can increase your browsing speed and can handle many online browsing restrictions very easily.
Common Internet Explorer(IE) Browser Shortcut Keys :
- Press F5 to refreshes the webpage.
- Press Backspace button back to the previous page.
- Press Alt+Home button same time to go home page of the website.
- Press any time Ctrl+N to open the new browser windows.
- Press F11 key to view any webpage in full-screen view and then again press for normal view.
- Press Ctrl+P keys to send the print command for current whole page.
- Press Ctrl+H keys to view your browsing history.
- Press Ctrl+w keys to close the current browser window.
- Press Esc button to stop any page browsing.


MediaMax Media Sharing Script | Media Hosting Script Youtube Clone
New Version 3.3 Released
Features :
- HD / SD Video Player Button
- If users upload a HD MP4 or MOV video, the HD/SD button allows users to swap between HD/SD quality
- Full HD Support
- Experience High Definition MP4 and MOV videos with zero quality loss when uploading. Watch true 1080p and 720p videos.
- Original Video Playback
- Our HD Video Player can now playback originally uploaded HD MP4 and MOV videos. Stunning Clarity!
- Optional Player Scaling
- Admins can get whether videos are scaled or not in the Admin Panel.
- New Audio Player!
- A new audio player has been added with auto scrolling related audios and scrolling audio title ticker
- Image Support For Video Advertisements
- You can now use images in addition to videos for pre-roll and post-roll advertisements in the video player
- In-Video Text Advertisements
- Admins can now add category based auto rotating in-video text advertisements that show up while a video is being played. Great for earning additional revenue!
- Ajax Comments Paging
- Video comments, audio comments and member profile comments now have paging support so comments can be limited per page and loaded instantly using ajax.
- E-Mail Alert System
- Member controlled e-mail alerts have been added for video conversion, new video comments, new picture comments, new audio comments, new profile comments, new private messages and new friend requests.
- Tag Clouds - Audios, Pictures and Videos
- Multiple tag clouds for audios, pictures and videos have been added to the homepage which load instantly via ajax.
MediaMAX supports multiple methods of video streaming, allowing you to stream your videos the way you want. Users can click anywhere on the video player and the video will load from there when video streaming is setup.
Lighttpd Streaming - Allows you to stream FLV Videos
Apache mod_flvx video streaming - Allows you to stream FLV Videos
Apache mod_h264 streaming - Allows you to stream HD MP4 Videos
What's New?
- With MediaMAX advanced media sharing script you can not only share videos, but also pictures / photos and audio / music / mp3's
Requirements :
Apache web server with mod_rewrite enabled.
MySQL version 4.0+
Cgi-bin Perl Access
GD Library 2+ with freetype support.
PHP 5.2+ with the following configuration
safe_mode = off
open_basedir = (no value)
output_buffering = on
register_argc_argv = On
max_execution_time = 1000 (Recommended or higher)
session.gc_maxlifetime = 15000 (Recommended or higher)
upload_max_filesize = 100M (Recommended or higher)
post_max_size = 100M (Recommended or higher)
register_globals = off
Mplayer + Mencoder (http://www.mplayerhq.hu/design7/dload.html)
LAME MP3 Encoder (http://lame.sourceforge.net)
Flv2tool (http://inlet-media.de/flvtool2)
Libogg + Libvorbis (http://www.xiph.org/downloads)
FFmpeg (http://ffmpeg.mplayerhq.hu)
Ability to run PHP from the command line (CLI) with exec()
Ability to execute background processes with exec("binary > /dev/null &")
To stream videos, servers are required to have one or more of the following additional server requirements:
Lighttpd Streaming Lighttpd web server with mod_flv_streaming installed.
Apache mod_flvx Video Streaming
Apache web server with mod_flvx installed.
Apache mod_h264 Video Streaming (HD)
Apache web server with mod_h264 installed.
Unlimited Web Hosting Supported for MediaMAX Files Websites :


iDocScript - Document Sharing Script - Powerful Document Sharing Script
New Version 2.0.2 Released
Features :
- iDocScript allows you to upload documents in multiple formats
- include pdf, doc, xls and ppt.
- Multiple Languages Supported
- iDocScript is a multilingual document sharing script.
- The script comes pre-loaded with english, french and spanish language packs.
- Easily add new languages!
Create your own popular document sharing website.
Upload and share documents with everyone.
Embeddable document viewer displays documents right on your website.
What's New?
- Upload Progress Bar
- A new upload progress bar with statistics has been added.
- Automatic Thumbnails
- Thumbnails can now be automatically generated from uploaded pdf files.
- More Document Formats Supported
- Support has been added for more document formats including pdf, ppt, xls and doc
- French Language Pack
- The french language pack has now been added
- Integrated Document Reader
- A new integrated document reader has been added, which allows documents to be viewed directly on the website.
Requirements :
- iDocScript requires a linux server with the following setup:
- Apache web server with mod_rewrite enabled.
- MySQL version 4.0+
- Access to cgi-bin.
- GD Library 2+ with freetype support.
- PHP 5.2+ with the following configuration
- safe_mode = off
- open_basedir = (no value)
- output_buffering = on
- register_argc_argv = On
- max_execution_time = 1000 (Recommended or higher)
- session.gc_maxlifetime = 15000 (Recommended or higher)
- upload_max_filesize = 100M (Recommended or higher)
- post_max_size = 100M (Recommended or higher)
- PHP upload_progress extension (http://pecl.php.net/package/uploadprogress)
- Imagemagick
- Ability to run PHP from the command line (CLI) with exec()
- Ability to execute background processes with exec("binary > /dev/null &")
Web Hosting Supported for iDocScript Website :


If you are not having the CD or DVD from the manufacturer any more, you'll need to download it from the manufacturer's website. As with finding the printer manual, you can do a Google search for the name and model of your printer plus the word "driver" (e.g., "HP Deskjet 3050 driver").
Here are some links to the driver downloads sections of major printer manufacturers.
HP: Select your printer category or type in the name and model in HP's search box.
Canon: Click on "Consumer & Home Office" then "Printers & Multifunction" then your printer series and finally "Drivers & Software" beside your printer model.
Epson: Choose your printer category then select the model, or type in the product name in Epson's search box.
Make sure you download the driver specifically for your operating system (e.g., Windows XP or Windows 7).Then follow the instructions above, replacing the part with the installation CD and using the downloaded driver instead.

Steps for Formatting the Windows XP System and Installating the New Opertaing System :
For Windows XP Downloads : Click Here
For Windows XP Products Review : Click Here
1.First of all insert the windows xp bootable disc into the drive and restart the computer
2.The the screen displays "Press any key from boot CD" Press ENTER (If windows starts automatically without displaying such a message then follow the Step-A)
3.System will load some files please wait untill it completes it takes some time
4.After that "Windows XP Professional setup " will appear Press ENTER
5.After that "Windows XP Licencing aggrement " will appear Press F8
6.Again "Windows XP Professional setup " will appear Press ESC
7.Now the system shows an other screen containing your Hard disc partition drives, if you need to format only C-Drive the select C-Drive using arrow keys in keyboard and Press ENTER (Or if you wanted to format total system follow Step-B)
8.In the next screen Select "Format the partition using NTFS file system " Press ENTER
9.Now the setup will Formats your C-Drive and next it will copies files, it takes much time, be patient
10.Now the system starts rebooting wait for 15 seconds or Press ENTER to reboot immediately
11.System gets restarted And again asks "Press any key from boot cd" But please dont press any key
12.Windows starts installing, it takes approximately 39Minutes to install but dont go away from system there is some manual work while installing
13.Exactly after 6 Minutes system displays an message box click on Next using Mouse
14.In the next screen "Personalize your software" will displays enter your Name and organization
15.Enter The Windows XP key in the next screen and Press ENTER
16.In the next screen it asks for computer name enter the name and there is also another field asking adminstrator password, leave it empty and Press ENTER
17.In the next screen set the Date and Time zone (+5:30) and click Next
18.Setup still requires 29minutes of time to complete and after that it gets restarts And again asks "Press any key from boot cd" But please dont press any key
19.In the Next Screen "Display Setting Box" Will Appear Click OK And "Monitor Setting Box" Also Appear Again Click OK, Then The Window Gets Started
20.Click on NEXT it And Next Select Help Protect My PC And Then Click Next And then Enter Your User Name (Different From Computer Name) Click Next And Then Click Finish :)This Is The Way To Format Your System Easily :)Exceptional Cases
STEP-A::Again Restart Your Computer And While restarting
Continuously press DELETE button in the keyboard
* "Advanced BIOS Features" Will Displayed* Click On First Boot Device And Press Enter*Select CD-ROM By Using Up_Down Arrows in Keyboard and Press
Enter*Press F 10*Press Y And Then Press ENTERThen the System Again restarts And Now it Will Ask "Press any key
from boot cd" Then Continue From Step 3
STEP-B::If You Wanted To Format Your System Completely Follow These Steps
*Select The C-Drive And Then Press D And then Press ENTER And
Then Press L*In The Same Way Delete All Drives D,E,F... By Clicking L and D
Keys*Your Hard Disk Will be In A Single unpartitioned Space Form Now
Our work is to create Drives with Suitable Memmory For Each Drive*For Example If You Have 160GB Hard Disc And You Want 4 Drives
Give 40 GB For Each Drive(Partition need not be same for all drives
we can give (40+40+40+40) Or (30+40+40+50) Or (30+30+40+40+20)
Etc....*To Make Partition First Click On The Unpartitioned Space and Press
C And Press ENTER And Give The Appropriate Memory Space Such
That C-Drive Created*Agian Click IOn The Unparyioned Space And Create D-Drive.. In
The Same Way Create All Other Drives By Clicking C*After Partition Select C Drive and Press Enter.. Thats it The Windows
Setup Will Be Installed